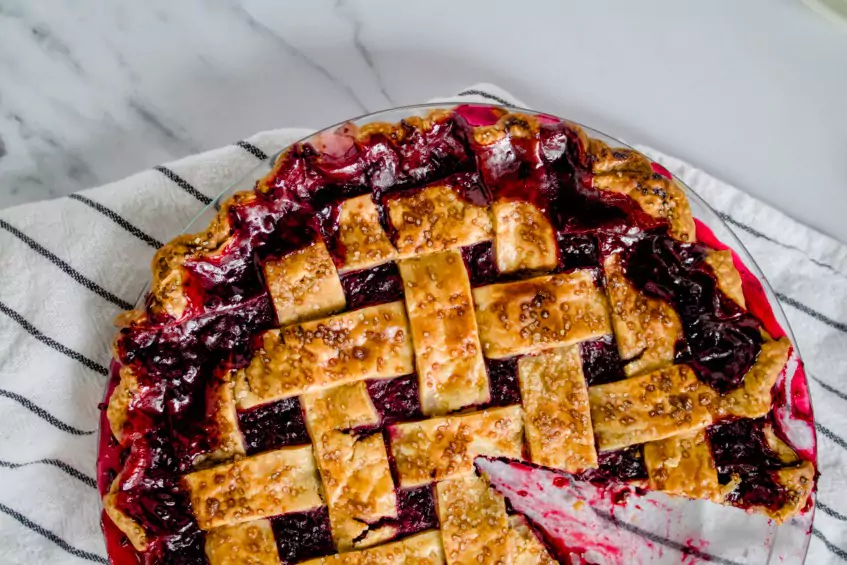
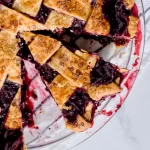
Blackberry Pie (Made With Frozen Berries)
Craving a slice of homemade blackberry pie but don’t have fresh berries on hand? No problem! This blackberry pie recipe is made using frozen blackberries.
Using frozen blackberries means you can enjoy this pie any time of the year, and it comes together with just a handful of simple ingredients you probably already have in your kitchen.
This recipe is perfect for anyone who wants to whip up a delicious pie without needing to wait for fresh berry season.
Whether you’re baking for a family gathering, a cozy weekend treat, or just because pie makes everything better, this recipe is here to make your dessert dreams come true.
So, preheat your oven and dust off your rolling pin—it’s time to bake a blackberry pie that’s as easy as it is irresistible!
Why you’ll love this blackberry pie recipe
This blackberry pie using frozen berries is a dessert dream come true!
Whether you’re a seasoned baker or just starting out, this recipe is foolproof, bursting with flavor, and perfect for any occasion.
Here’s why you’ll fall in love with it:
Uses frozen berries for year-round baking: No fresh blackberries? No problem! This recipe relies on frozen blackberries, so you can enjoy the taste of summer even in the middle of winter.
Simple and foolproof: With straightforward steps and easy-to-find ingredients, this pie is perfect for both beginners and busy bakers.
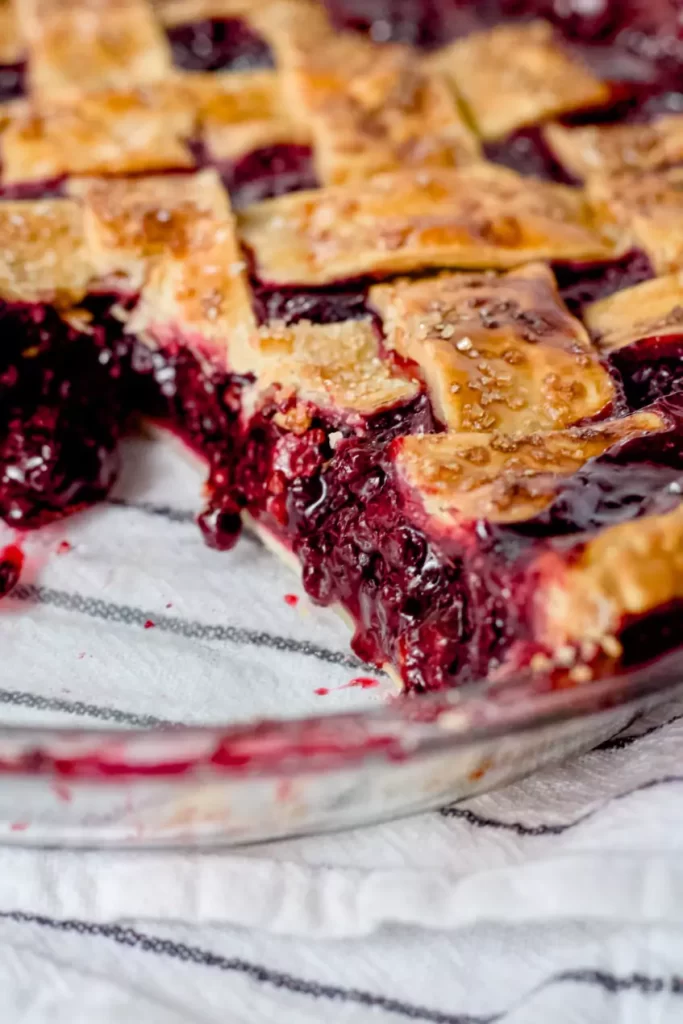
Perfectly set berry filling: The blackberry filling is perfectly set, so you can cut a perfect slice every time.
Blackberry pie ingredients and some notes
Let’s talk ingredients! This easy blackberry pie is made with simple, wholesome staples you probably already have on hand (especially if you keep a stash of frozen blackberries).
Here’s a quick rundown of each ingredient and why it’s essential for creating a delicious, no-fail pie:
- Blackberries – The star of the show! Blackberries bring their juicy, sweet-tart flavor to this pie.
- Sugar – Sweetens the tart blackberries and balances the overall flavor. Feel free to adjust the amount slightly based on how sweet your berries are.
- Cornstarch – This is the thickener for the pie filling, helping it set until it’s perfectly sliceable without being too jelly like.
- Lemon juice – A splash of lemon juice brightens the filling, enhancing the blackberry flavor while adding a subtle tang.
- Butter – A few small pats of butter on top of the filling add richness and create a luxurious texture as the pie bakes.
- Salt – Just a pinch enhances all the other flavors and keeps the pie from tasting one-note. Don’t skip it!
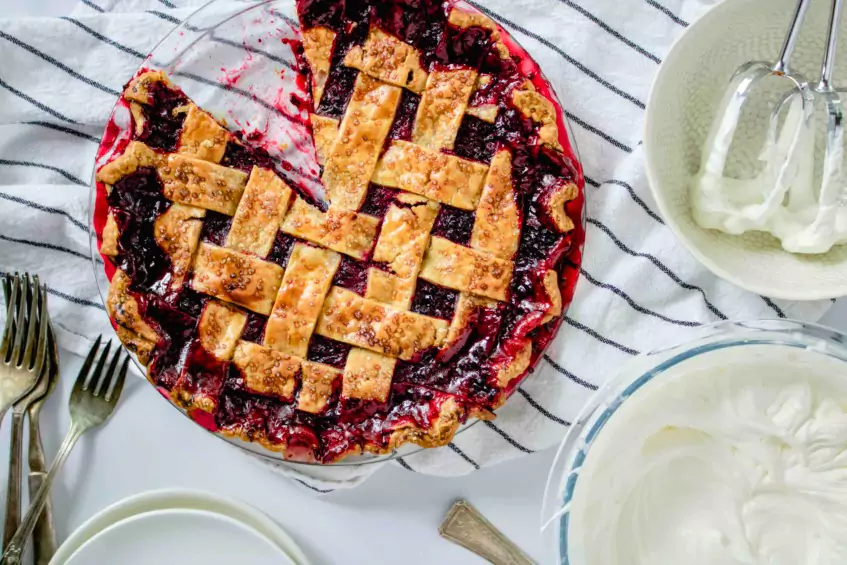
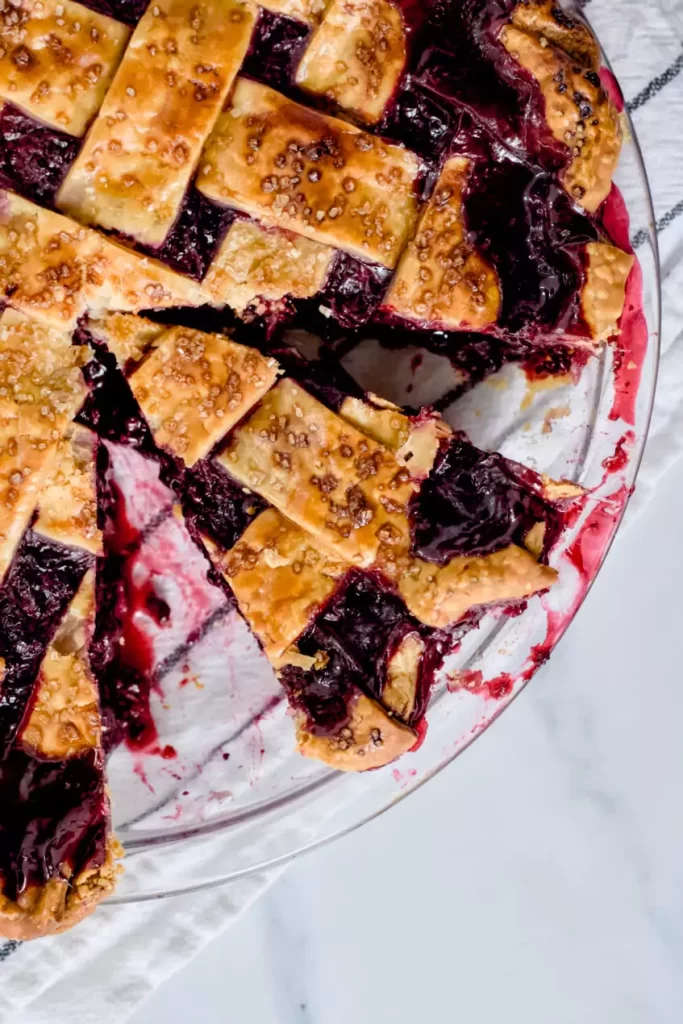
- Two 9” pie crusts – One for the bottom and one for the top. You can use a store-bought crust or make your own using this recipe. A lattice or full top crust both work perfectly.
With these simple ingredients, you’re well on your way to making a gorgeous pie that’s as easy to whip up as it is to devour!
How to make blackberry pie with frozen blackberries
Here’s a step-by-step guide to creating a perfectly baked, juicy, and delicious blackberry pie:
- Prepare the pie crust. Start by rolling out your pie dough. If you’re using store-bought crust, let it sit at room temperature for a few minutes to soften slightly. Roll one portion into a circle and gently press it into a 9-inch pie pan, leaving the edges overhanging. Place the crust in the fridge while you prepare the filling.
- Preheat the oven. Set your oven to 400°F (205°C). Position the rack in the lower third of the oven to help the bottom crust bake through without getting soggy.
- Make the blackberry filling. In a large mixing bowl, place the frozen blackberries. Microwave them for about 30 seconds, just to thaw them slightly. Next, add sugar, cornstarch, and lemon juice. Toss until the berries are evenly coated.
- Fill the crust. Pour the blackberry mixture into the prepared pie crust. Use a spatula to spread it out evenly.
- Add the top crust. Roll out the second portion of dough and place it over the filling. You can leave it whole and cut a few slits for ventilation or create a lattice top for a decorative touch. Trim and crimp the edges to seal the pie.
- Brush and sprinkle. Beat 1 egg to make an egg wash. Lightly brush the top crust, then sprinkle with a little granulated sugar for extra crunch and sweetness.
- Bake. Place the pie on a baking sheet to catch any drips and bake for 45 – 50 minutes. The filling should be bubbly, and the crust should be golden brown. If the edges brown too quickly, cover them with a strip of aluminum foil.
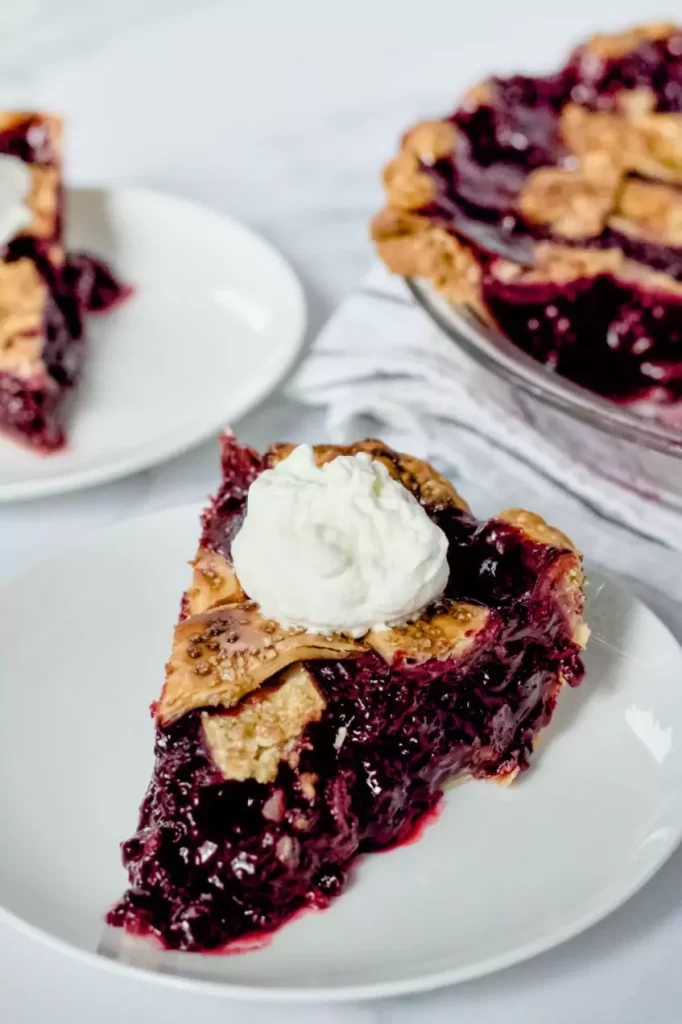
- Cool. Let the pie cool completely on a wire rack. This allows the filling to set, making it easier to slice.
And there you have it—your blackberry pie is ready to enjoy! Serve it as-is or with a scoop of vanilla ice cream for a classic treat.
Baking tips
Making a blackberry pie with frozen berries is a breeze when you have a few tricks up your sleeve. Frozen berries are a convenient, affordable option that ensures you can enjoy a taste of summer any time of year.
To help you create the perfect pie every time, here are some tips to keep in mind:
- Use cornstarch as a thickener. Frozen berries release more liquid during baking than fresh ones, so a thickening agent is essential. Cornstarch works wonders to create a filling that’s perfectly set and not runny.
- Don’t skip the ventilation. If you’re using a double crust or a lattice top, be sure there are vents to let steam escape. This allows for excess moisture to cook off and helps the berry filling set.
- Preheat the baking sheet. To avoid a soggy bottom crust, place your pie dish on a preheated baking sheet in the oven. The extra heat helps the bottom crust bake evenly and stay crisp.
- Protect your crust. The edges of a pie crust can brown quickly, so use a pie shield or aluminum foil to cover them about halfway through baking. This ensures a golden, perfectly cooked crust without any burnt edges.
- Let it cool completely. As tempting as it is to slice into your pie right out of the oven, let it cool completely. This allows the filling to thicken and set, so every slice holds its shape.
With these simple tips, your blackberry pie will turn out beautifully every time—juicy, flavorful, and perfectly baked.
How to store leftover pie
Once you’ve baked your delicious blackberry pie, you’ll want to store it properly so you can enjoy every last crumb. Whether you’re saving it for a quick breakfast treat or a midweek dessert, keeping your pie fresh is simple with these tips.
Storing at room temperature: Your pie can sit at room temperature for up to two days, covered loosely with foil or plastic wrap. This is especially handy if you plan to enjoy it within a day or two—it’s ready for easy slicing and serving!
Refrigerating for longer storage: For longer storage, place your pie in the refrigerator. Cover it with plastic wrap or store individual slices in airtight containers. The pie will keep for up to 4-5 days this way.
With these storage tips, your blackberry pie will stay fresh and ready for whenever your craving strikes.
Conclusion
There you have it—an easy, no-fail blackberry pie made with frozen berries that’s bursting with flavor!
Whether you’re baking for a holiday, a special occasion, or just because you’re craving something sweet, this pie is sure to impress.
With its perfectly flaky crust and juicy blackberry filling, it’s a dessert that tastes like you spent hours in the kitchen (even though it’s surprisingly simple to make).
We hope this recipe becomes a go-to in your kitchen, as it’s a great way to enjoy blackberries all year round.
Blackberry Pie (Made with Frozen Berries)
December 27, 2024Equipment
- 9" pie dish
- pastry brush
- baking sheet
- aluminum foil
Ingredients
- 2 9" pie crusts (homemade or store bought)
- 4 cups frozen blackberries (20 oz / 570 g)
- ¾ cup sugar (150 g)
- 1 TBS lemon juice
- ¼ tsp salt
- 5 TBS cornstarch (80 g)
- 2 TBS unsalted butter, cubed (30 g)
- 1 egg (for egg wash)
- 1 tsp coarse sugar
Instructions
- Place an oven rack in the bottom third of the oven. Heat the oven to 400º F. Line a baking sheet with aluminum foil or parchment paper and set aside.
- If using homemade pie crust, roll out the pie dough into two 12" circles. If you're using store-bought crust, let it sit at room temperature for a few minutes to soften slightly. Line a 9" pie dish with one of the pie crusts. Place the lined pie dish and the top crust in the fridge to chill while you make the blackberry filling.2 9" pie crusts
- Place the frozen blackberries in a large microwave safe bowl. Microwave the berries for about 30 seconds. You want to microwave them just enough so they become a little juicy, but not so much that they completely defrost.4 cups frozen blackberries
- Add the sugar, lemon juice, salt, and cornstarch to the blackberries. Stir together until the berries are coated and no dry cornstarch remains.¾ cup sugar, 1 TBS lemon juice, ¼ tsp salt, 5 TBS cornstarch
- Pour the berry filling into the lined pie dish. Use a spatula to spread it out evenly. Evenly distribute the cubed butter over the top of the berry filling.2 TBS unsalted butter, cubed
- Add the top crust. For the top crust you can either make a lattice top or simply roll the top pie dough round over the berries and cut a few slits to allow moisture to escape during cooking. Trim, seal, and crimp the edge of the pie.
- Whisk an egg in a bowl. Using a pastry brush, carefully brush the egg wash over the top of the pie. Sprinkle the coarse sugar over the top of the pie.1 egg, 1 tsp coarse sugar
- Place the assembled pie on the lined baking sheet (the baking sheet catches drips during baking). Put the pie in the oven and bake for 45 – 50 minutes. After 25 minutes, cover the edges of the pie with foil to prevent over browning.
- Remove the baked pie from the oven. Let it cool on a wire rack for at least 4 hours to completely cool and set. Once completely cool, slice and enjoy!