How to Turn Regular Yogurt into Greek Yogurt
Learn how to turn regular yogurt into Greek yogurt!

Love the thick, creamy texture of Greek yogurt but only have regular yogurt in your fridge? You’re in luck—it’s surprisingly easy to turn regular yogurt into Greek yogurt right at home!
With just some basic equipment and a little patience, you can strain out the excess liquid and be left with that luscious, spoonable goodness we all love.
Whether you need Greek yogurt for breakfast bowls, dips, or baking, learning how to turn regular yogurt into Greek yogurt is a great kitchen hack to have up your sleeve.
Why you’ll love this technique
With just regular yogurt and a little patience, you can transform it into luscious, protein-packed Greek yogurt right at home—no fancy equipment needed!
Here’s why you’ll love it:
It’s budget-friendly – Skip the pricey tubs of Greek yogurt at the store. This method lets you make your own using affordable plain yogurt, saving money while still enjoying all the creamy goodness.
No extra ingredients required – You don’t need any thickeners or additives—just plain yogurt and a strainer. That means you’re in full control of what goes into your yogurt.
Custom thickness, every time – Whether you like it just slightly thicker or very thick, you get to choose the texture by simply adjusting the straining time.
DIY Greek yogurt ingredients and equipment
Turning regular yogurt into thick, creamy Greek yogurt is easier than you might think—all you need are a few basic kitchen tools.
Here’s what you’ll need to get started:
- Plain yogurt – Use any plain yogurt you like (whole milk, low-fat, or nonfat). Bonus points if you make the yogurt yourself!
Equipment:
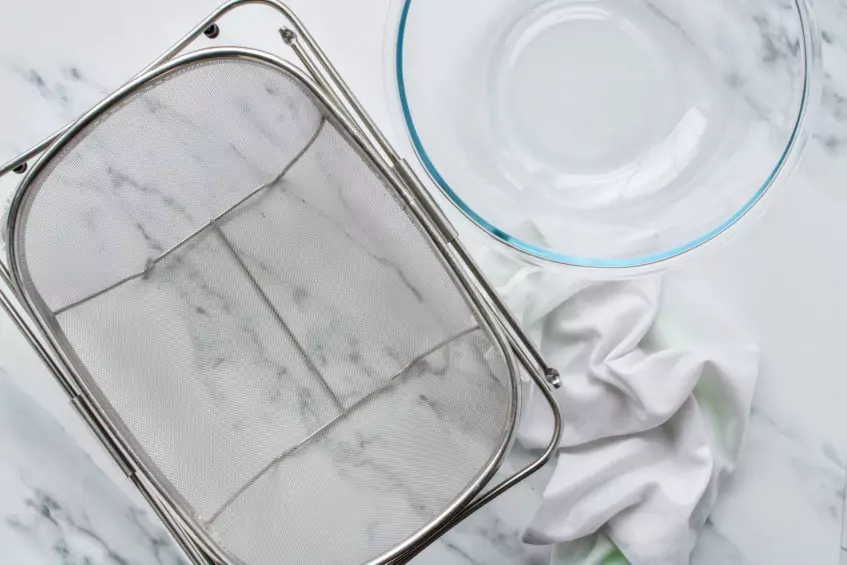
- Large bowl – To catch the liquid (whey) as it drains from the yogurt.
- Large mesh strainer or colander – This will hold the yogurt as it drains.
- Cheesecloth – To line the strainer and allow the whey to drip through while keeping the yogurt in place. You can also use a clean nut milk bag or thin kitchen towel as an alternative.
How to turn regular yogurt into Greek yogurt
Making Greek yogurt at home is incredibly easy and only takes a few simple steps.
All you need mostly is a little patience. It’s worth the wait though when you’re left with thick, creamy Greek yogurt—perfect for snacking, dips, or using in your favorite recipes.
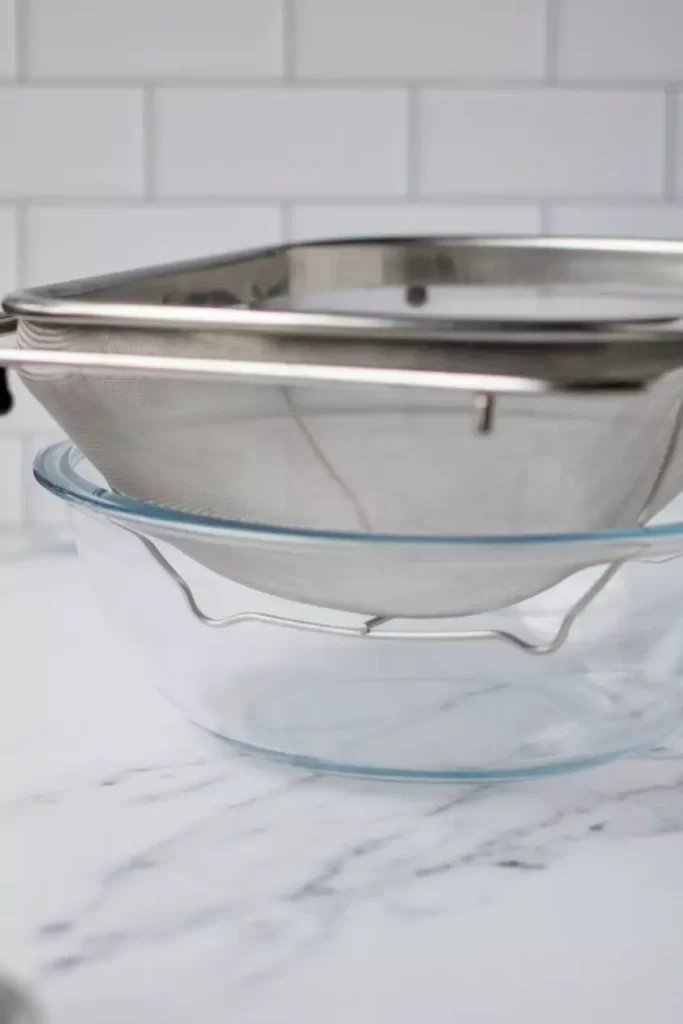
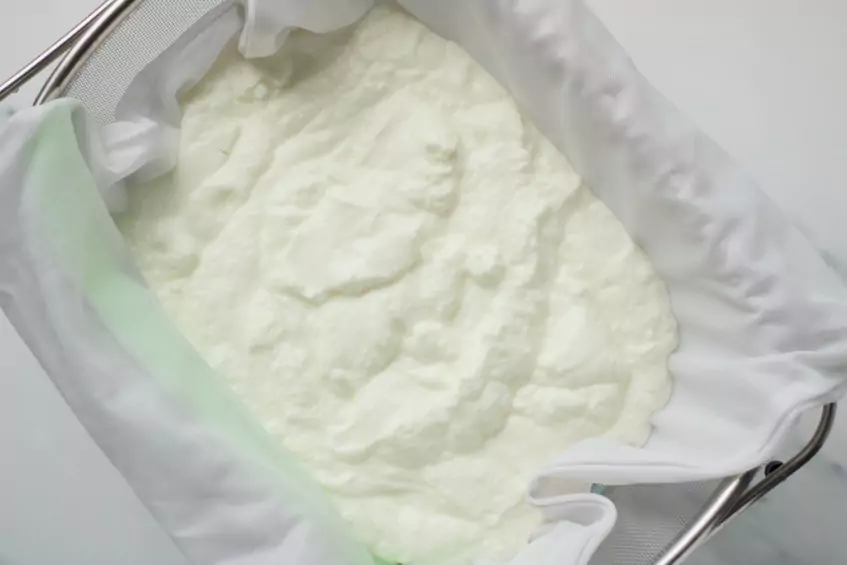
- Set up your strainer. Place a large colander or mesh strainer over a large bowl. Make sure the bottom of the strainer is at least 2 inches above the bottom of the bowl so the liquid (whey) has space to drain out.
- Line the strainer. Lay a large piece of cheesecloth (or a clean, thin dish towel) over the colander, making sure there’s enough overhang to prevent any yogurt from slipping through.
- Add the yogurt. Pour your regular yogurt into the lined colander. You can use plain store-bought yogurt or homemade—just make sure it doesn’t have any thickeners or added flavors if you want a classic Greek yogurt result.
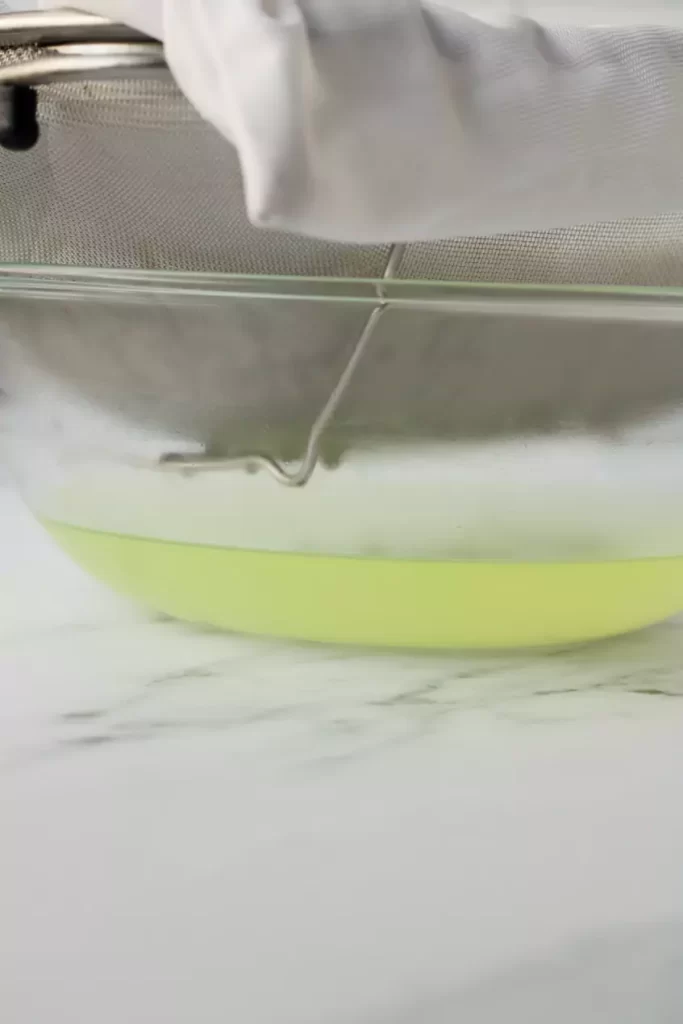
- Refrigerate and strain. Place the whole setup in the fridge, uncovered. Let the yogurt strain for 2 to 5 hours, depending on how thick you want it. The longer it strains, the thicker it becomes.
- Transfer and store. Once the yogurt has reached your desired consistency, transfer it from the cheesecloth into an airtight container. Store in the fridge and enjoy within a week.
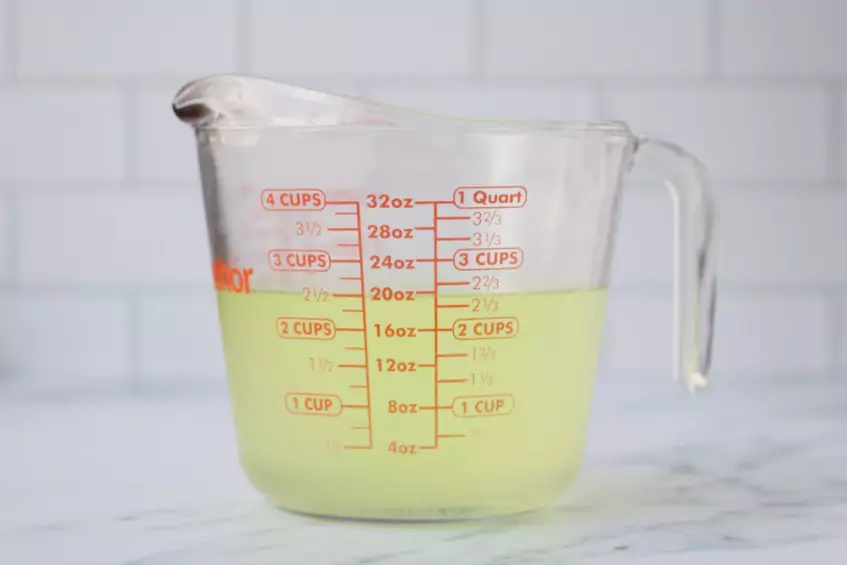
- Save the whey. Don’t toss the liquid that drained out! You can freeze the whey in an ice cube tray for later use. It’s great in smoothies, soups, or even as a liquid substitute in pancakes and baked goods.

Conclusion
Turning regular yogurt into Greek yogurt is a great way to get thick, creamy yogurt without an extra trip to the store.
Whether you’re using it as a breakfast base, a savory dip, or a healthier swap in recipes, strained yogurt is a super versatile addition to your kitchen.
All you need is a little time and a strainer!
How to Turn Yogurt into Greek Yogurt
Equipment
- regular yogurt
Materials
- fine mesh strainer or colander
- large bowl
- cheesecloth
Instructions
- Place a large colander or mesh strainer over a large bowl. Make sure the bottom of the strainer is at least 2 inches above the bottom of the bowl so the liquid (whey) has space to drain out.large bowl, fine mesh strainer or colander
- Lay a large piece of cheesecloth (or a clean, thin dish towel) over the colander, making sure there’s enough overhang to hold all the yogurt.
- Pour your regular yogurt into the lined colander. You can use plain store-bought yogurt or homemade.
- Place the whole setup in the fridge, uncovered. Let the yogurt strain for 2 to 5 hours, depending on how thick you want it. The longer it strains, the thicker it becomes.
- Once the yogurt has reached your desired consistency, transfer it to an airtight container. Store in the fridge and enjoy within a week.
- Don’t toss the liquid that drained out! You can freeze the whey in ice cube trays for later use. It’s also great in smoothies, soups, or even as a substitute for the liquid in pancakes and baked goods.